Follow this simple guide to download, install, and start using GatewayVPN on your PC or laptop.
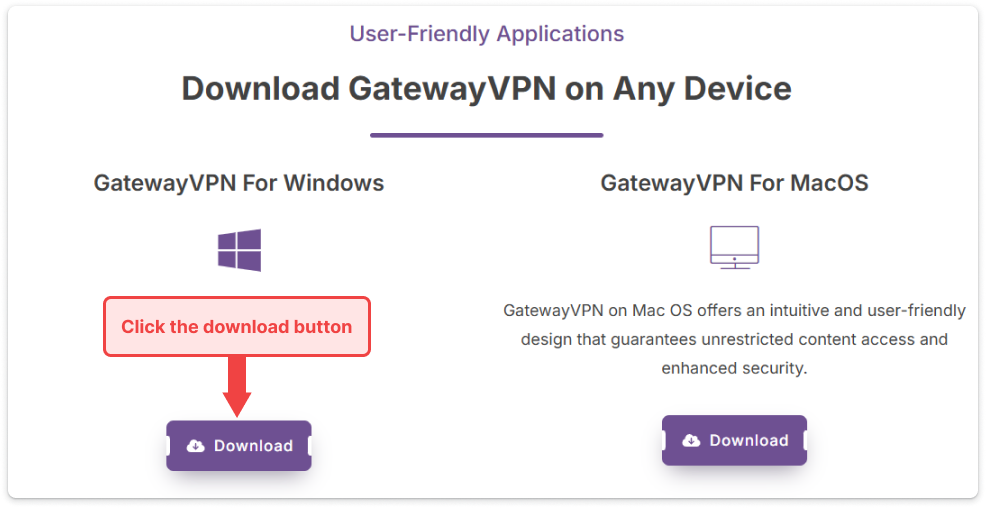
- Open your browser and go to our downloads page. Under the Windows section, click the Download button.
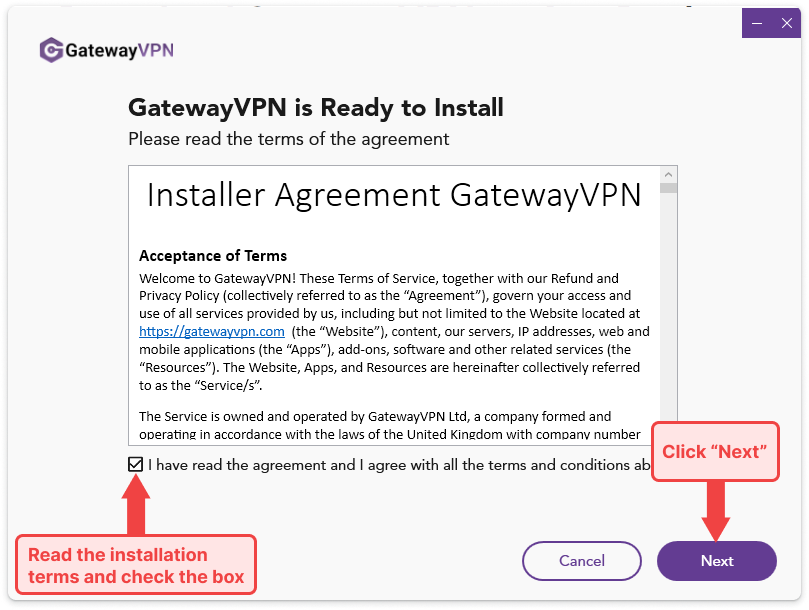
- Double-click the downloaded GatewayVPN_Setup.exe file and follow the on-screen instructions.
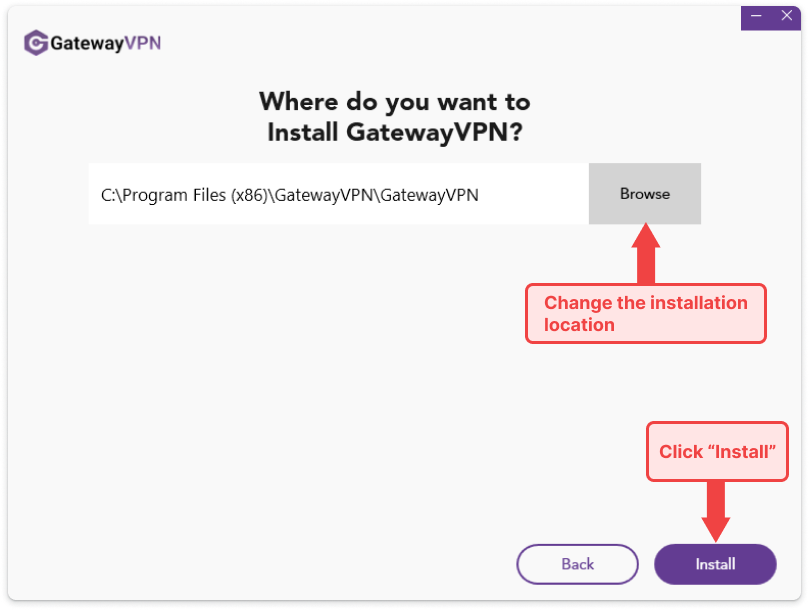
- Choose installation location (or use default) and click “Install“.
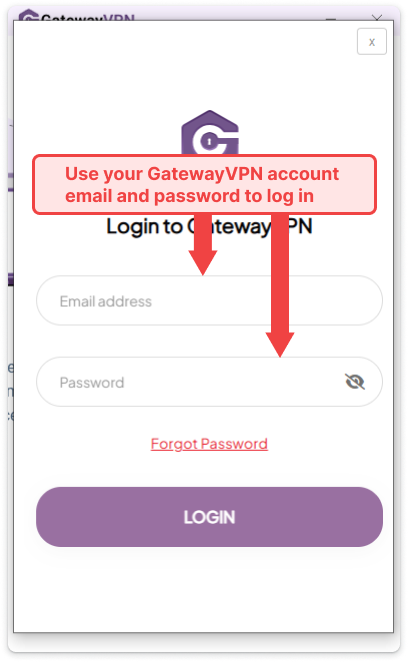
- You’ll be prompted to log in or create an account.

- If new, register using your email. If existing, enter your login details.
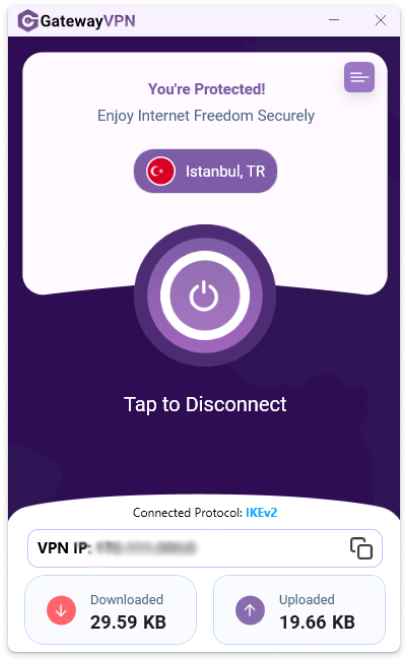
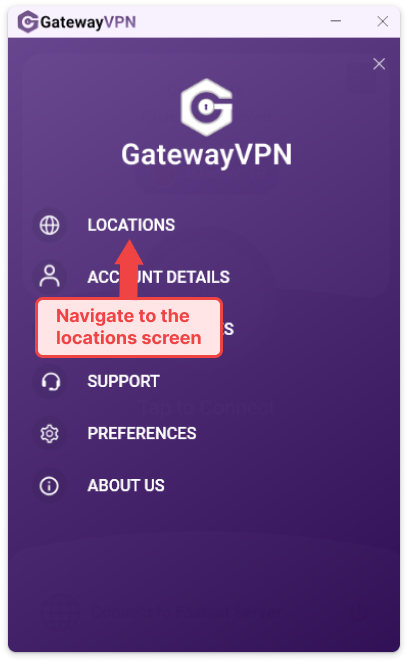
- You can connect to the fastest server based on your location or go to the “Locations” menu.
- Choose a location (e.g., United States, Netherlands, Singapore) based on your needs.
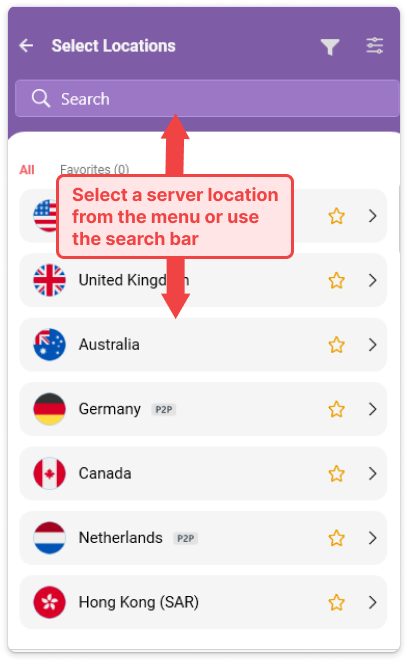
- Click the server name to select it. Your internet traffic is now encrypted and protected by GatewayVPN.